
· By Angela Seto
Time to fire up grandpa's extractor
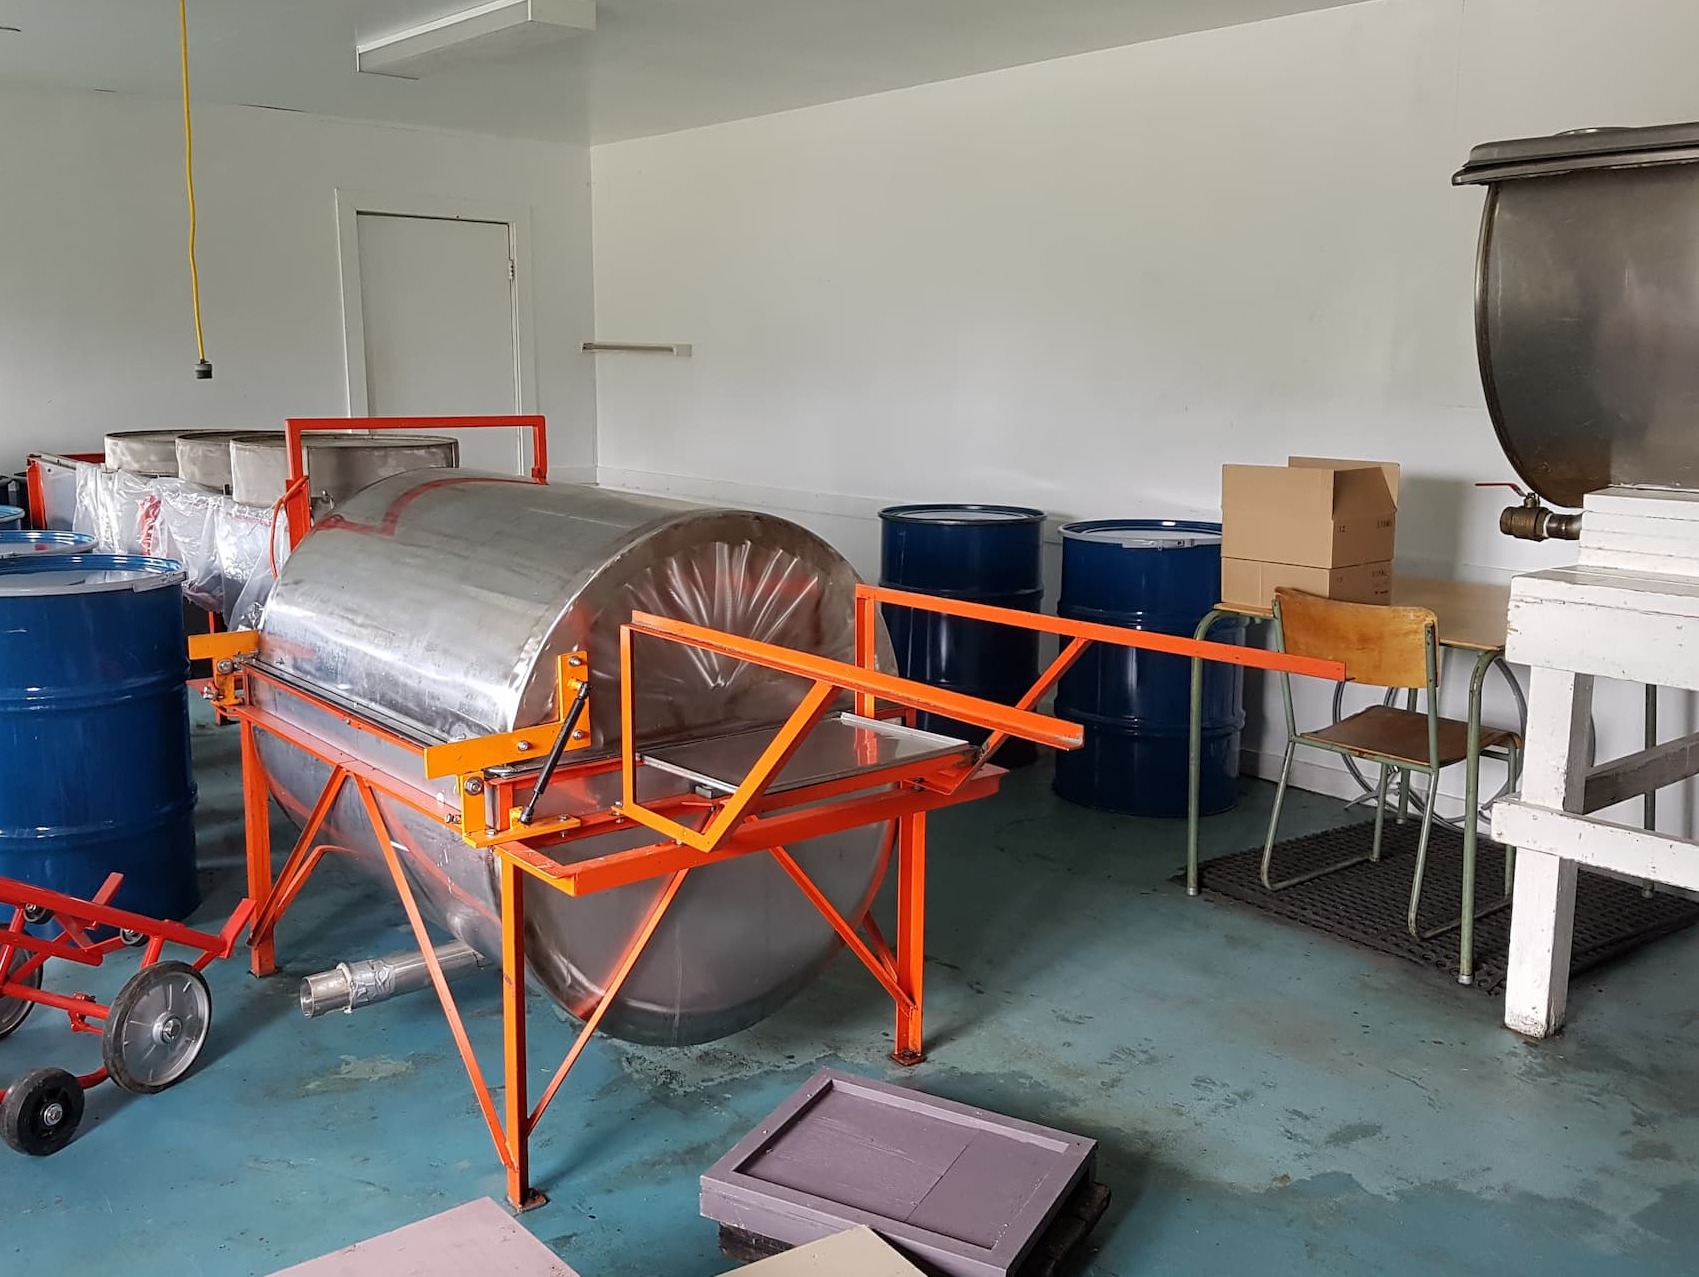
Before the honey-storm: our old prototype extractor in the center, and our settling tank on the right.
What's new on the farm:
The heat is here and so is the honey!
With the crops in full bloom and the sun shining bright, the bees have had many perfect flying days. After weeks of watching and waiting, the first honey boxes we put out are finally ready to harvest!
Before we bring any honey in, we get our little extracting facility (we call it the “honey house”) ready to go. It’s pretty modest, but it does the job.
Our harvesting crew heads out to the yards, removes the bees from the boxes, and brings the boxes back to the honey house.
The boxes go straight into one of our two small heat rooms (set around 39°C / 102°F). This keeps the honey at the same warm temperature it was inside the hive, so it stays nice and runny for extracting.
Once the boxes are warm, we move them into the extracting room. We start by scraping off any extra wax on top of the frames so they don’t jam.
Then we use a special tool to “uncap” the honey, which means gently scratching open the thin beeswax seals on both sides of each frame.
The uncapped frames go into our 60-frame extractor. The machine was a prototype that Andrew’s grandfather took a chance on decades ago that’s still running strong.
When we spin the frames, the honey flies out of the cells, hits the walls, and collects at the bottom. From there it moves through screens that catch most of the wax, then into a tank that holds just over 2 tons.
That tank is tiny compared to what the big commercial guys use (some have tanks as big as 20 tons!), but it’s one of our favorite things. Because the tank is small, we can keep almost every yard’s honey separate. Each barrel we fill is basically a little snapshot of one specific outyard at one special time.
After the honey settles overnight, we barrel it up, label it, and wheel everything outside to be moved into the quonset. There it sits until it's time to head to our honey kitchen for creaming and packaging.
Reading all this, you can probably tell we still do a lot of the work by hand. It’s not that different from how Andrew’s grandpa did it years ago.
On a good day, our harvesting crew can bring back around 120-180 boxes, and our extracting crew can extract 150-200 boxes. Over a 4-to-6-week harvest, everyone ends up pretty tired!
We know there are fancier machines out there with conveyors and giant extractors, and upgrading is definitely a future goal.
When Andrew and I first started, we were a bit self-conscious about our small setup when we met with big retailers or clients interested in our production capacity.
But over time, we've learned to appreciate doing it the hands-on way. It lets us stay small-batch and protect the unique character of every yard’s honey.
And being small-batch is something we’ll never give up, no matter how much we grow.
Overnight Chia Pudding with Honey Fruit Compote
Last week I shared the first of two recipes from Andrew's dad. Here is the second one that will help increase your fiber intake and keep you satiated and happy after breakfast. It makes 5 portions, so you can do it once and have breakfast ready to go for several days.
Ingredients:
For the yogurt base:
- 850 g plain yogurt (I buy plain yogurt made from whole milk, not skim, and this is actually not common in grocery stores in Canada. The brand I get in Canada is called Olympic Krema and contains 10% milk fat.)
- 1 cup chia seeds
- 3/4 cup milk (again I use whole milk, but the choice is yours)
- Optional: protein powder, collagen, creatine, etc. to boost it. The recipe is for 5 portions, so you'd add the equivalent of 5 doses. You'll definitely need the fruit compote to help mask the chalky protein powder.
For the fruit compote:
- 3 cups of your choice of frozen berries or fruit. Andrew's dad used half frozen rhubarb and half frozen strawberries.
- Juice from 1 whole lemon
- 1/2 cup honey or adjust to taste depending on the fruit.
Directions:
- Assemble the yogurt base: Mix the yogurt, chia seeds, milk, and any optional supplements together.
- Portion out the base into 5 small containers with airtight lids and set in the fridge.
- Make the fruit compote: Add the fruit into a medium saucepan. Turn it on to high heat until the fruit begins to break down, and then lower the heat to medium.
- Add the lemon juice and continue to cook down until the fruit softens completely and breaks down.
- Take the fruit off the heat and let it cool.
- Once cool, add honey.
- Blend the compote with an immersion blender.
- Add the fully cooled compote to the chia yogurt base and leave overnight.
This is a starter recipe so you can adjust the flavors, sweetness, and proportions of the fruit compote to yogurt base to your liking!